I have always considered myself an “Energy Nerd” 🙂 Since I started in building, I have continually searched out and tried new (and old) ways of building houses to be “greener” and more energy-efficient. In 2007 I designed and helped build the very first L.E.E.D. Certified home in the state of Indiana. Also, in 2014 I was the first builder in Central Indiana to be certified through the Passive House Institute, US as a Certified Passive House Builder.
I believe that homes should not only be built to the highest construction & durability standards, but they should also be built to the highest energy efficiency standards, so they cost less to live in over the life of the home.
Using advanced construction methods, and the principles of Passive House construction, we have succeeded in building some of the most efficient homes in the state of Indiana!
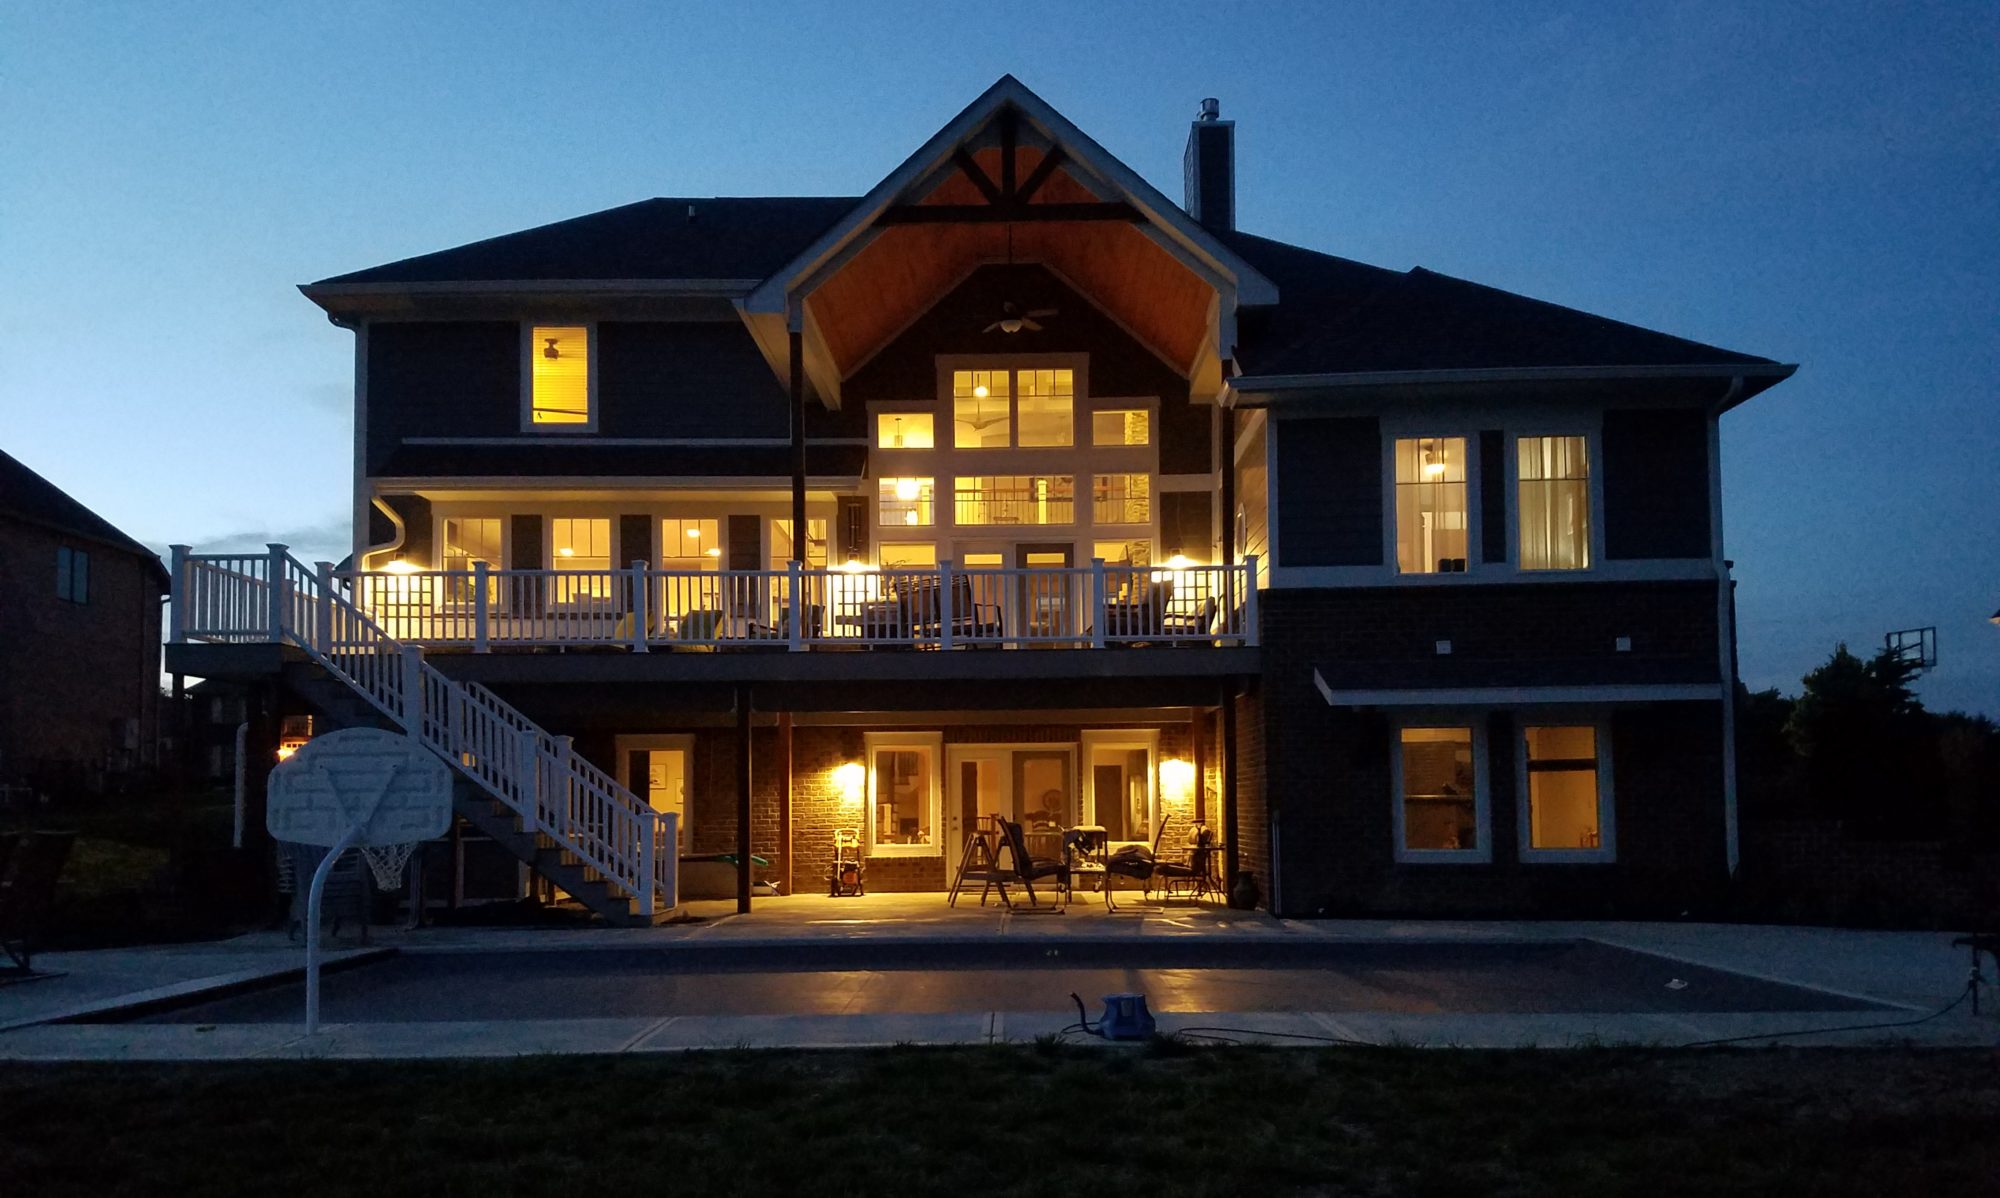
Case Study, Luxury Home 2016, Brownsburg, IN:
Home Stats:
- 5,630 square feet
- 3 stories
- 7 bedrooms
- 4-1/2 baths
- Full walk-out basement
- H.E.R.S. Rating: 30 (70% more efficient than a Code Built house)
- Air Leakage (Blower Door) test: 0.35 ACH @ -50 pascals (one of the tightest homes in the entire country!)
This home, occupied by a family of four, has an energy tracking system on the HVAC equipment, and total heating and cooling combined for an entire 12 months was $430.00! No, that’s not a typo. It’s not a monthly average, it is a 12 month total!
Here’s how we did it: The first thing we did was to choose a lot with the back of the house facing to the south. The reason for this is to take advantage of Passive Solar Heating. Most of the windows are on the back (South) side of the house. There are 36″ overhangs over all the windows on the back, on all 3 levels. In the wintertime, when the sun is low on the horizon, the sun comes through the windows about 12 feet into the home, and heats the hard surfaces of the home, which lowers the need for active heating. In the summertime, when the sun is high in the sky, the sun is blocked by the overhangs, and hits the side of the house below the window sills. Because this direct sunlight is not coming into the home and heating everything up, it minimizes the need for air conditioning.
The next thing we did we learned from building several S.I.P. Homes. These homes are built with wall panels that have 2 sheets of OSB plywood spaced 4″ or 6″ apart, and filled completely with closed cell polyurethane foam. The benefit of that construction method is the foam stops the “Thermal Bridging”. Thermal Bridging is when the cold from the outside bleeds through your brick or siding, through your sheathing, through your studs, and leaves a cold stripe on the inside of your drywall. The downside of using S.I.P.’s walls is the cost. It is a very expensive product. Instead, we started framing all our houses with 2×6 top and bottom plates, with 2×4 staggered-studs. It looks like this:


Then we dense-pack the wall cavities with Stabilized Blown Cellulose. This insulation has a glue built into it to keep it from settling, and borax added to keep the bugs out and make it fireproof. This wall construction method leaves a full 2″ gap filled with insulation to stop the Thermal Bridging. This wall construction method adds approximately $3.40 per each 10′ section of exterior wall, when compared to building 2×6 studs @ 16″ on center.
The next thing to do is to make the home virtually air-tight. The reason we want to make the home airtight, is “A leaky house, is an energy waster!”. The next step we do to minimize air-leakage is use ZIP System Sheathing on the exterior of the home, with all the joints taped and sealed. This product eliminates the need for Tyvek style house wrap, and creates an airtight wall assembly:


The next piece to the “airtight & efficiency puzzle”, is to spray the entire attic floor (topside of the drywall ceiling) with 2 inches of open-cell spray foam. This completes the airtight envelope. Also, in that step, if there is any ductwork in the attic, we cover it with a landscape fabric, and completely encase it in foam also:

Once that’s complete, we cover all of it with several feet of blown cellulose insulation. These steps completely protect the ductwork from the heat & cold that builds in the attic throughout the year. It essentially brings the ductwork inside the Thermal Envelope. Code minimum attic insulation value is an R-38. We insulated here to above an R-75.

Our next piece of the puzzle was installing a Geothermal Ground Source Heat Pump. There are many brands of Geothermal systems, but we chose to use Water Furnace brand. Water Furnace is what I consider the “Cadillac” of the different geothermal manufacturers, and we chose it primarily because of the “Symphony” energy monitoring system option they offer. Using this system we can monitor and track the entire energy usage for heating and cooling over days, weeks, months, and years. Here’s a shot of the page that tracks the dollar amounts:

This 12 month period was from July 1st, 2016 to June 30th, 2017. The total heating cost was $205.00, and total cooling cost was $217.00. The thermostat remains on 72º F, year around. One interesting aspect of this system is the unit is a 2-1/2 ton system (a house this size usually requires a 5-6 ton unit). It also has a 2-speed compressor. The first speed runs at about 1-1/2 ton capacity, the second speed runs at the full 2-1/2 ton capacity. The Symphony system tracks how much energy is used in first stage and second stage separately. Although in the cooling mode the unit did go into the second stage for approximately 1/3 of the total cooling, in the heating season, it never got out of stage 1, and certainly never went into “emergency heat” mode. So, in essence, this home can be heated all winter long with just a 1-1/2 ton furnace!
H.E.R.S. Index Rating and Blower Door Test:
Every new home that is built in Indiana must get both a Blower Door Test, and a H.E.R.S. Index Rating. How Does the HERS Index Work?
The HERS Index is an easy-to-understand approach to measuring a home’s energy efficiency. A home is assigned a numerical value based on its overall energy performance; this is its HERS Index Score. The lower the score, the more energy efficient the home. The HERS Index Score is the one number that tells you all you need to know about a home’s total energy performance; it’s like a miles-per-gallon sticker for houses! It is based on a 0-100 scale. An index of 0 means it is a “Net-Zero-Energy” home. (It produces as much energy as it uses). A rating of 100 is a house built to code minimums. Unfortunately, in Indiana, many houses are still built to code minimums by both production home builders AND custom home builders. One of the calculations that goes into determining the HERS Index Score is a Blower Door Test. This tests how “leaky” a house is. Basically, it pulls a vacuum on your house to a negative 50 pascals, and records the number of times per hour the fan replaces the ENTIRE volume of air in your home. By Indiana Energy Code standards, your new home can be no leakier than a rating of 7 ACH @ -50p. (7 Air Changes Per Hour @ -50 pascals). This home was tested by TSI Energy Solutions, the largest energy rating company in the Midwest. This home tested out at 0.35 ACH @ -50p. They said it was the tightest home they have ever tested!
Overall, the HERS Index Score on this home came in at 30. This means it is 70% more efficient than a code built house! You can search the results of any home that has been rated (including this one) by clicking on the picture below:

The way we like to look at the saving is; for every $100,000.00 of mortgage you are borrowing, you will have approximately $400.00 per month in payments. If your heating and cooling costs are $400.00 per year, instead of $400.00 per month, imagine how much more house you would be comfortable building!
Ready to learn how you can build to these standards? Contact Allen now!